How to Build a Website from Scratch Under the AWS Free Tier (Part I: Front)
by Anas El MhamdiI used to love to pick up any CMS to launch and host a website. As a growth professional, I valued this flexibility for testing ideas and landing pages. However, experience revealed limitations.
WordPress was not customizable enough anymore for me. Moreover it started to get on the expensive side and I felt like I didn’t get what I was paying for. This frustration drove me to search for alternatives.
I needed a quick and easy solution to host potential tech products, where I can manage front and back end on a suite of services I am familiar with.
The goal for this tutorial is clear: demonstrate how to build (or transfer) your website from scratch on AWS in a few steps, making it faster, safer and cheaper.
The example used throughout is my own site, “5€ pour rien,” which translates to “5 euros for nothing” — deliberately absurd.
What You’ll Need
Before we begin, make sure you have:
- An AWS account
- A domain name (optionally purchased through Route 53 for easier configuration)
Technologies Used
This tutorial leverages three primary AWS services:
- S3: Content storage and static website hosting
- CloudFront: Global content distribution network
- Amazon Certificate Manager: Free SSL/TLS certificates for security
- Route 53: DNS management (optional but recommended)
Host Your Website Files on S3
Step 1: Prepare Your Website Files
First, you’ll need your website files. You can either build your own from scratch or use templates from HTML5UP to get started quickly.
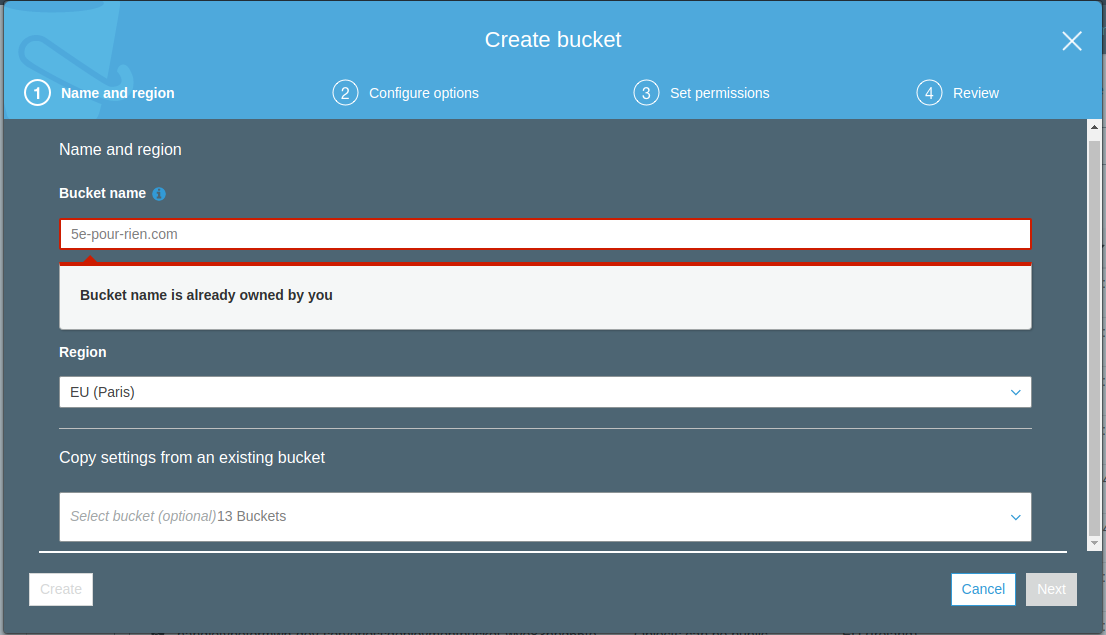
Step 2: Create S3 Buckets
Log into the AWS console and navigate to S3. Create two buckets with these names:
your-domain.com(root domain)www.your-domain.com(www subdomain)
Use the default options when creating the buckets initially.
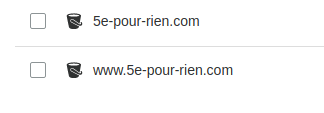
After creation, you should see both buckets in your S3 console:
Step 3: Upload Your Website Files
Upload all your website files to the www.your-domain.com bucket. This will be the primary bucket hosting your content.
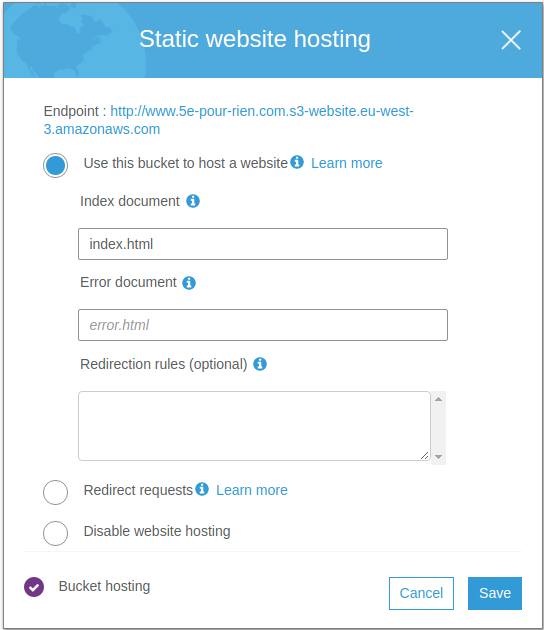
Step 4: Enable Static Web Hosting
For the www.your-domain.com bucket:
- Navigate to the Properties tab
- Scroll down to Static Web Hosting and click Edit
- Select “Use this bucket to host a website”
- Enter
index.htmlas the index document - Optionally enter
error.htmlas the error document
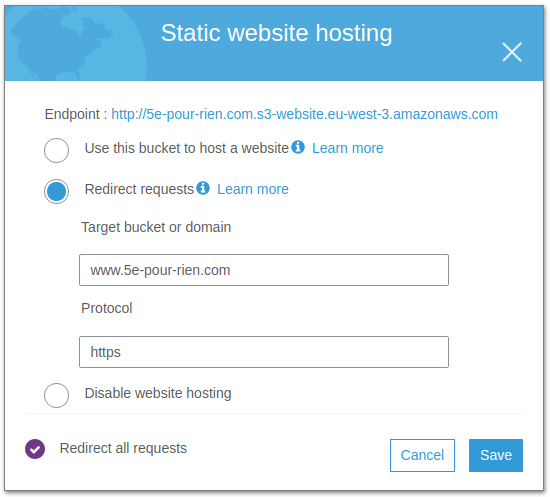
Step 5: Configure Root Domain Redirect
For the your-domain.com bucket:
- Go to Properties
- Select Static Web Hosting
- Choose “Redirect requests”
- Enter
www.your-domain.comas the target bucket or domain - Select
httpsas the protocol - Check “Redirect all requests”
Step 6: Set Public Access Permissions
To make your website publicly accessible, you need to apply a bucket policy.
For the www.your-domain.com bucket:
- Navigate to the Permissions tab
- Scroll to Bucket Policy
- Paste the following policy (replace
www.your-domain.comwith your actual domain):
{
  "Version": "2012-10-17",
  "Statement": [
    {
      "Sid": "PublicReadGetObject",
      "Effect": "Allow",
      "Principal": "*",
      "Action": "s3:GetObject",
      "Resource": "arn:aws:s3:::www.your-domain.com/*"
    }
  ]
}
Important: Take caution in not hardcoding any sensitive data in the files you upload, as they will be publicly accessible.
Apply the same permissions policy to the root bucket (your-domain.com), adjusting the resource ARN accordingly.
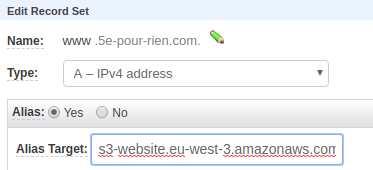
Step 7: Connect Your Domain (Optional)
If you want to access your site through your domain name before setting up CloudFront:
Using Route 53:
- Go to Route 53 and click Hosted Zones
- Select your domain
- Click Create Record Set
- Enter
wwwas the name - Select A — IPv4 address as the type
- Enable Alias
- Select your S3 bucket from the dropdown
Using an external domain manager: Create an A record pointing to your S3 endpoint.
At this point, your website should be accessible via the S3 endpoint. However, it’s not secured with HTTPS yet. That’s where CloudFront comes in.
Secured Distribution with CloudFront
Step 1: Request an SSL Certificate
- Navigate to AWS Certificate Manager (ACM)
- Important: Ensure you’re in the US-EAST (N. Virginia) region — this is Amazon’s global region and required for CloudFront
- Click Request a certificate
- Choose Request a public certificate
- Add both your root domain (
your-domain.com) and www subdomain (www.your-domain.com)

Step 2: Validate Your Certificate
Choose your validation method:
- Email validation: If you have email set up for your domain
- DNS validation: Add the provided CNAME records to your DNS zone. This method takes time but is more reliable (faster if you’re using Route 53)
Wait for the certificate status to change to “Issued” before proceeding.
Step 3: Create a CloudFront Distribution
- Navigate to CloudFront in the AWS console
- Click Create Distribution
- Click Get Started under Web distribution
Step 4: Configure Origin Settings
In the Origin Domain Name field:
- Do not select from the dropdown suggestions
- Instead, paste your S3 website endpoint directly (e.g.,
www.your-domain.com.s3-website.eu-west-3.amazonaws.com) - You can find this endpoint in your S3 bucket’s Properties tab under Static Web Hosting
Important: Using the website endpoint (not the bucket endpoint from the dropdown) ensures proper handling of index documents and error pages.
Step 5: Configure Cache and HTTPS Settings
In the Default Cache Behavior Settings:
- Find Viewer Protocol Policy
- Select Redirect HTTP to HTTPS
This ensures all visitors are automatically redirected to the secure version of your site.
Step 6: Configure Distribution Settings
In the Distribution Settings section:
- Alternate Domain Names (CNAMEs): Enter both
www.your-domain.comandyour-domain.com
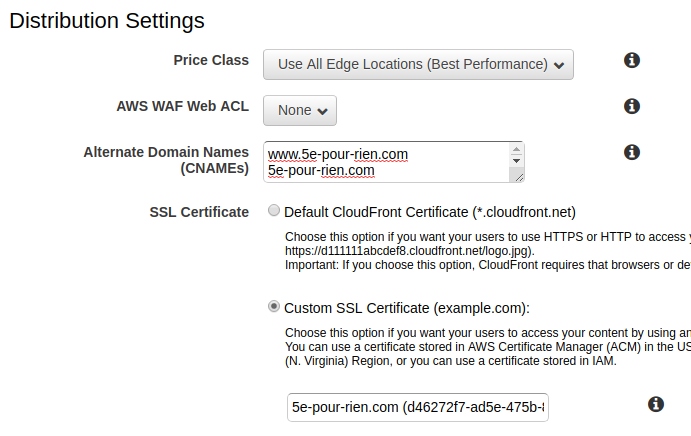
- SSL Certificate: Select Custom SSL Certificate
- Choose the certificate you created earlier from the dropdown
- Click Create Distribution
Your distribution will now be deployed. This typically takes 10-40 minutes. You can monitor the status in the CloudFront console.
Step 7: Update DNS Records
Once your distribution is deployed and shows a status of “Deployed”:
- Copy your CloudFront distribution domain name (e.g.,
d2vjuey3qbdw4b.cloudfront.net) - Go to your DNS manager (Route 53 or external)
In Route 53:
- Navigate to your hosted zone
- Create or edit the A record for your domain
- Set it as an Alias record
- Select your CloudFront distribution from the dropdown under CloudFront distributions
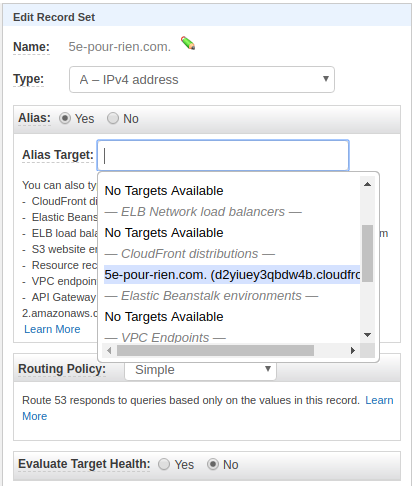
- Repeat for the www subdomain
In an external DNS manager: Create CNAME records pointing to your CloudFront distribution domain name.
After DNS propagation (which can take a few minutes to 48 hours), your website will be live, secured with HTTPS, and distributed globally through CloudFront’s edge locations.
Bonus: Making Live Changes Instantly
CloudFront caches your content at edge locations worldwide, which speeds up delivery but means changes to your S3 files won’t appear immediately. To make changes live instantly, you can use CloudFront invalidations.
AWS provides up to 2,000 free invalidations per month, making this practical for frequent updates.
How to Create an Invalidation
- Navigate to CloudFront in the AWS console
- Select your distribution
- Go to the Invalidations tab
- Click Create Invalidation
- In the Object Paths field, enter
/*to invalidate all files - Click Invalidate
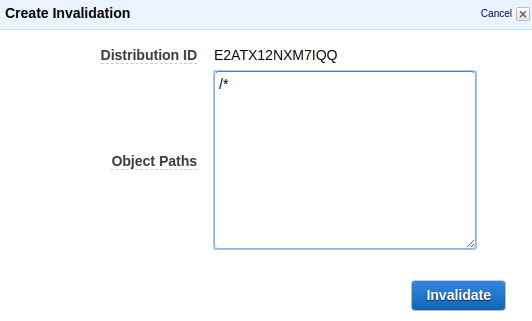
The invalidation typically completes within a few minutes, and your changes will be visible globally.
Tip: Make and test all your changes locally first, then upload to S3 and create a single invalidation, rather than invalidating after each small change.
What’s Next
Congratulations! You now have a fast, secure, and cost-effective website hosted on AWS.
If you already have a backend running, you can just enjoy the cheap rates and speed as is. For those without a backend or looking to build one, stay tuned for Part 2, where I’ll demonstrate how to build a super lightweight and scalable backend with AWS Lambda functions.
This two-part series aims to help you transition from traditional CMS platforms to a more customizable, cost-effective AWS-based solution that gives you full control over your infrastructure.